Introduction
At some point in every reef keeper’s journey, the same realisation hits.
You are at work. Or asleep. Or on a two-week holiday. And somewhere at home, your reef tank is doing something you cannot see. A heater stuck on full. A dosing pump that ran dry three days ago. A return pump that seized overnight while your sump slowly drained onto the floor.
By the time you notice, the damage is done.
An aquarium controller does not make reef keeping easier in the way that a better skimmer or a brighter light does. It makes reef keeping safer — fundamentally, structurally safer — in a way that no other single piece of equipment can match. It is the difference between knowing your tank is fine and hoping it is.
This guide explains exactly what an aquarium controller does, why it matters more than most reefers realise, and how to choose the right one for your system. By the end, you will understand why experienced reefers consistently list their controller as the equipment they are most glad they bought — and the thing they wish they had bought sooner.
What Is an Aquarium Controller?
An aquarium controller is a dedicated computer system that monitors the parameters in your reef tank and controls the equipment connected to it — continuously, automatically and around the clock.
At its most basic level, a controller does two things:
1. Monitors — temperature, pH, salinity, ORP and other parameters through connected probes, logging values continuously and alerting you when anything drifts outside safe limits.
2. Controls — lights, pumps, heaters, skimmers, dosing pumps, ATO systems and any other equipment plugged into its power bar, executing schedules and conditional logic automatically.
The combination of these two functions creates something genuinely powerful: a system that not only knows what is happening in your tank at every moment, but can take corrective action and notify you before a problem becomes a catastrophe.
The Problem With Manual Reef Keeping
To understand why a controller matters, it helps to understand what manual reef keeping actually looks like at scale.
A reef tank without a controller is a collection of independent devices, each running on its own timer or running continuously without feedback. Your heater turns on and off based on its own thermostat — which may be calibrated incorrectly, may stick open or may fail entirely. Your lights run on a mechanical timer that has no awareness of anything else happening in the system. Your return pump runs continuously with no monitoring — if it seizes, nothing notices.
Now multiply this across every piece of equipment in your system. Heater. Chiller. Return pump. Two or three powerheads. Protein skimmer. Dosing pumps. ATO. Refugium light. UV steriliser. Each device is an island — operating independently, unable to communicate with anything else, unable to trigger a response when something goes wrong.
This works fine on a good day. On a bad day — a pump that seizes, a heater that sticks, a dosing container that runs dry — you find out when you look at the tank. Which might be 12 hours later. Or three days later when you get home from a trip.
A controller changes this fundamentally. Every device becomes part of a connected, communicating, responsive system. Problems trigger alerts. Failures trigger automatic responses. The tank watches itself.
What a Controller Actually Monitors
Temperature
Temperature is the parameter that kills tanks fastest. A heater that sticks open will raise tank temperature by 1°C per hour in a typical reef system. At 4°C above optimal, coral bleaches. At 6°C, fish begin to die. At 10°C, the tank is lost.
A controller with a temperature probe monitors continuously — not just when you check it — and sends an alert to your phone within minutes of a deviation. More importantly, it can be programmed to turn off the heater outlet if temperature exceeds a set maximum, preventing the runaway heating that causes catastrophic losses.
This single function alone justifies a controller for any serious reef keeper.
pH
pH in a reef tank fluctuates naturally throughout the day — typically 0.1–0.3 units between the low point (early morning, before photosynthesis raises it) and the high point (late afternoon). This natural fluctuation is normal and harmless.
What is not normal is pH dropping below 7.8 at night due to CO2 buildup from a house with poor ventilation — a surprisingly common issue that slowly stresses coral and suppresses calcification. Or pH spiking above 8.5 due to a kalkwasser reactor problem. A controller logs pH continuously, making trends visible over days and weeks in a way that manual testing simply cannot reveal.
Salinity and ORP
Higher-tier controllers add conductivity probes for continuous salinity monitoring — catching slow evaporation before it drives salinity dangerously high, or detecting a freshwater addition that has diluted the system. ORP (oxidation-reduction potential) is an indirect measure of overall water quality — a declining ORP trend often precedes visible water quality problems by days.
Equipment Power Consumption
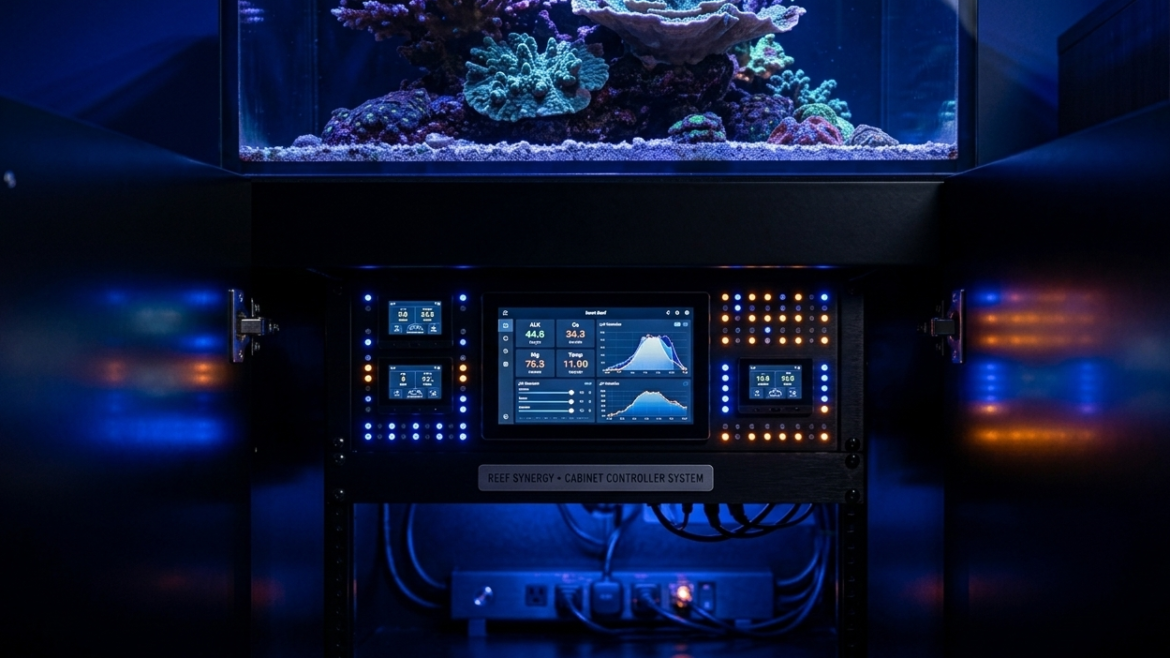
This is one of the most underappreciated features of modern controllers. The EnergyBar 832 included with Neptune Apex systems monitors the actual power draw of every connected outlet — in real time.
A return pump drawing zero watts when its outlet is on means a seized impeller. A heater drawing continuous full power when it should be cycling means a stuck thermostat. A skimmer whose power consumption has dropped 20% over three weeks indicates impeller fouling that is reducing efficiency long before it becomes visible. These are problems that a controller detects automatically — problems that would otherwise only be noticed when the consequences became obvious.
What a Controller Actually Controls
Equipment Scheduling
The most basic function — and already a significant improvement over mechanical timers. Instead of separate timers for each device, every piece of equipment in your system runs on a single coordinated schedule programmed through one interface.
Your lights ramp up gradually over 30 minutes at 9am rather than snapping on abruptly. Your skimmer turns off automatically for 30 minutes after feeding. Your refugium light runs opposite to the display light schedule to buffer pH through the night. Your ATO activates only during daylight hours when evaporation is highest. All of this runs automatically, day after day, with no manual input.
Conditional Logic and Automation
This is where controllers move beyond timers into genuine intelligence. Conditional programming allows you to create rules that respond to what is actually happening in the tank — not just what time it is.
Examples of conditional logic that experienced reefers use:
- If temperature exceeds 82°F, turn off heater and turn on chiller
- If pH drops below 7.9 for more than 30 minutes, send alert and turn on refugium light
- If return pump power draw drops to zero, send emergency alert and turn on backup circulation
- If salinity probe reads above 36 ppt, turn off ATO pump and send alert
- Turn off all pumps at 12pm every day for 5 minutes (feed mode)
Each of these rules runs automatically, around the clock, without you doing anything. The tank responds to itself.
Dosing Pump Integration
When a dosing pump is connected to a controller, the possibilities expand significantly. Rather than dosing fixed volumes on a fixed schedule, the controller can adjust dosing based on actual probe readings.
Connected to a Neptune Trident or GHL KH Director that measures alkalinity automatically, the controller can increase or decrease the dosing pump output to maintain alkalinity at exactly 8.3 dKH — not approximately 8.3, but precisely 8.3 — adjusting day by day as coral growth rates and consumption change with the seasons.
This is the closest thing to a self-managing reef tank that currently exists. And it is only possible with a controller at the centre of the system.
ATO (Auto Top-Off) Integration
Evaporation removes freshwater from the tank but leaves salt behind — driving salinity up slowly over hours and days. Manual top-off works, but requires daily attention and is the kind of task that gets skipped when life gets busy.
An ATO system connected to a controller adds safety layers that standalone ATO units cannot provide. The controller monitors both the ATO float sensor and the salinity probe — if the ATO pump has been running for longer than the expected top-off duration, the controller can cut it off and send an alert (indicating a stuck float sensor or a leak). If salinity continues rising despite ATO activation, it can alert you that the RO/DI reservoir may be empty.
The Real Cost of Not Having a Controller
Let us be specific about what controller-preventable disasters actually cost.
Heater failure: A $30 heater that sticks open destroys $500 in coral and $200 in fish before you notice it the next morning. A controller sends an alert within 15 minutes and turns off the heater outlet automatically.
Return pump seizure: A seized return pump drops the sump water level until the display overflows or the skimmer runs dry. If it happens overnight, you wake up to a flooded stand and a crashed skimmer. A controller detects zero power draw on the pump outlet within seconds and sends an emergency alert.
Dosing pump malfunction: A dosing pump that sticks on — delivering ten times the intended alkalinity dose overnight — causes rapid tissue necrosis in SPS corals within hours. A controller with dose volume limits and pH monitoring detects the pH spike caused by excess alkalinity and shuts down the dosing outlet automatically.
Slow evaporation with no ATO: Without monitoring, salinity creeps from 35 ppt to 38 ppt over two weeks of missing top-offs. Coral stress is visible but the cause is not immediately obvious. A controller with a salinity probe sends an alert when salinity hits 36 ppt — before stress becomes visible.
The cost of a mid-range controller — $300 to $500 — is recovered after preventing a single significant equipment failure. For most reefers with established systems, that prevention pays for itself within the first year.
Choosing the Right Controller for Your System
Entry Level: Neptune Systems A3 Apex Jr — ~$300
The most accessible entry point into the Apex ecosystem. Monitors temperature, pH, water level and leak detection right out of the box. Two AquaBus ports allow expansion to full equipment control by adding an EB832 Energy Bar.
Best for: New reefers who want monitoring and alerts before committing to full equipment control. Soft coral and beginner LPS systems. Anyone wanting to enter the Apex ecosystem at the lowest possible price.
Upgrade path: Add EB832 for full outlet control. Add PM2 for salinity. Add Trident for automated alkalinity, calcium and magnesium testing.
Mid Range: Neptune Systems Apex EL — ~$450
The most popular controller in North America. Includes the EnergyBar 832 with 8 individually monitored AC outlets and 1LINK ports for direct DOS and WAV pump integration. Monitors temperature and pH out of the box. Built-in WiFi with Apex Fusion cloud platform and iOS app.
Best for: Mixed reef and LPS systems. Reefers who want full equipment control alongside monitoring. Anyone already running or planning to add Neptune DOS dosing pumps.
Key advantage: Per-outlet power monitoring catches equipment failures automatically. 1LINK connectivity means DOS dosing pumps and WAV pumps connect with a single cable and no additional power supply.
Mid Range: CoralVue HYDROS Control X4 Starter Pack — ~$450
Made in the USA with an IP65-rated industrial enclosure and aircraft-grade connectors. Dual-core processor makes all control decisions locally — no internet dependency. Four universal Sense Ports, two digitally isolated Probe Ports, 0-10V I/O and two Drive Ports.
Best for: Reefers who prefer a modular, flexible system without being locked into a single brand ecosystem. Those who want industrial-grade hardware at a mid-range price. Integrates with Focustronic Mastertronic for automated multi-parameter testing.
Key advantage: True distributed intelligence — every HYDROS device has its own CPU, so the system has no single point of failure.
Advanced: GHL ProfiLux 4e Starter Set — ~$500
Germany’s most trusted reef controller platform, used in public aquariums and research institutions worldwide. Runs ProfiLuxOS — a proprietary operating system built specifically for aquarium control. Lab-grade temperature and pH/ORP monitoring built in. Six controllable outlets via Powerbar 6E. 1-10V pump control, level sensor support, WiFi and built-in webserver.
Best for: Advanced reefers building serious SPS systems. Those who want European engineering and a platform that runs independently of cloud services. Integrates natively with GHL KH Director for automated alkalinity monitoring and GHL Doser 2.1 for precision dosing.
Key advantage: ProfiLuxOS runs entirely locally — no internet connection required for any function. Backed by lifetime free firmware updates and direct GHL support.
Controller Ecosystems: Why Compatibility Matters
One of the most important — and least discussed — aspects of choosing a controller is the ecosystem it belongs to.
A controller is not a standalone device. It is the centre of a network of connected equipment. The value of that network grows exponentially with each compatible device you add.
Neptune Apex ecosystem: Trident (automated Ca/Alk/Mg testing), DOS QuietDrive (dosing), WAV pumps, ATK (ATO), AFS (auto feeder), FMM (flow monitoring). All connect via AquaBus or 1LINK with native Apex Fusion integration.
GHL ecosystem: KH Director (automated alkalinity), Doser 2.1 (precision dosing), Stream pumps (flow), Expansion Cards (additional sensor inputs), Expansion Box 2. All communicate via ProfiLux Aquatic Bus with CAN-based reliability.
HYDROS ecosystem: WaveEngine (pump control), Dosing Pump, Kraken (24V power management), Water Level Sensors, Leak Detectors, WiFi Smart Outlets. Integrates with Focustronic Mastertronic via cloud API.
Choosing a controller means choosing an ecosystem. Consider which accessories you are likely to add over the next 2–3 years and choose the platform that supports your intended direction.
Setting Up Your Controller: First Steps
Getting a controller running does not require technical expertise. Modern controllers are designed around guided setup wizards that walk you through the process step by step.
Week 1: Monitoring only
Connect your temperature and pH probes. Calibrate the pH probe using the included calibration solutions — the guided wizard in Apex Fusion or GHL Connect makes this straightforward. Set your alert thresholds: temperature alert at 78°F high and 75°F low, pH alert at 8.4 high and 8.0 low.
Do nothing else yet. Just watch the data come in for a week. You will learn more about your tank from one week of continuous pH and temperature logging than from months of manual testing.
Week 2: Connect your equipment
Plug your heater, return pump, skimmer and lights into the controller’s power bar. Program your light schedule. Set your heater outlet to turn off if temperature exceeds 80°F. Set your return pump to send an alert if power draw drops to zero.
Week 3 onwards: Build automation gradually
Add feed mode. Program the skimmer to turn off for 30 minutes after lights-on. Set pH-based refugium lighting. Add ATO integration. Connect a dosing pump. Each addition makes the system more autonomous and more resilient.
The key is gradual. Add one automation at a time, verify it works correctly, then add the next. A controller configured too quickly with too many simultaneous automations becomes difficult to troubleshoot when something unexpected happens.
Common Controller Mistakes to Avoid
Setting alerts too wide. An alert threshold of 70–85°F for temperature will never fire — which means it will not warn you when the temperature hits 83°F. Set alerts within 1–2°F of your target parameters.
Not calibrating probes regularly. pH probes drift over time. Calibrate every 4–6 weeks with fresh calibration solution. A drifting pH probe that reads 0.3 units low will cause you to chase a problem that does not exist.
Automating dosing before understanding consumption. Calculate your alkalinity consumption manually over two weeks before automating dosing. Automating an incorrect dose compounds the error automatically.
Ignoring the data. A controller generates a continuous log of every parameter and every equipment event. Review it weekly. Trends in the data — a gradual pH decline, a slow increase in return pump power draw — tell you what is about to go wrong before it does.
Over-relying on the controller. A controller is a safety net, not a replacement for understanding your system. Know your parameters, understand your equipment and use the controller to automate and protect — not to avoid learning.
The Bottom Line
A reef tank without a controller is a system that depends entirely on nothing going wrong while you are not watching.
Things go wrong. Equipment fails. Parameters drift. The question is not whether your tank will have a problem — it is whether you will know about it in time to do something.
An aquarium controller gives you that knowledge. It watches your tank continuously, responds to problems automatically and puts the most important information about your reef in your pocket wherever you are in the world. For a system that represents hundreds or thousands of dollars in equipment and livestock — and months or years of work to establish — that protection is not a luxury. It is the most rational investment you can make.
Start with monitoring. Add control as your confidence grows. Build the automation gradually. The result is a reef that is more stable, more resilient and frankly more enjoyable to keep — because you spend less time worrying and more time watching.
Ready to add a controller to your reef system? Browse our full range of aquarium controllers — from the Neptune A3 Apex Jr to the GHL ProfiLux 4e — at Malta Sea.